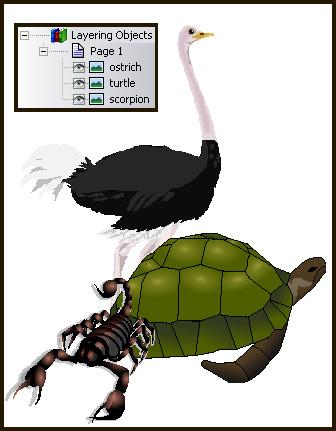
The example on the right shows three images layered on a page. Notice the order of the objects in the Title Explorer. The top-most object listed in the Title Explorer is on the bottom layer of the page, while the bottom-most object listed in the Title Explorer is on the top layer.
You can change the layering of an object using the controls on the right-click menu or the Home ribbon.
To change the layering of an object using the right-click menu:
-
Select the object that you want to layer differently.
-
Right-click the object, select Layering, and select the appropriate layering option. Choose from the following options:
Bring to Front
Places the object on the top layer.
Send to Back
Places the object on the bottom layer.
Up one layer
Moves the object one layer closer to the top.
Down one layer
Moves the object one layer closer to the bottom.
To change the layering of an object using the controls on the Home ribbon:
-
Select the object that you want to layer differently.
-
In the Arrange group on the Home ribbon,click Bring Forward to bring the object forward one layer. Click Bring to Front under Bring Forward to bring the object to the front layer. Click Send Backward to send the object backward one layer. Click Send to Back under Send Backward to send the object to the back layer.
You can also force an object to the top layer.
See also: Placing an object on the top layer